SBPL

SBPL
The Best Deal in Town!
Showing posts with label Cookbooks. Show all posts

Tuesday, December 16, 2014

Cannoli Gelato @MieleUSA Fundraiser

by DianeWhitman
Information Services

Hi Everyone,

We enjoyed fine music, wine and food the first week in December at the annual Music, Merlot, and Miele Fundraiser. The fabulous kitchen at Miele was the setting for my cooking demo of  elegant Rosemary Skewers of Monkfish, Ciabatta, and Pancetta drizzled with a Balsamic Reduction, and our to-die-for Cannoli Gelato -  recipe follows - please give it a try!

This easy and impressive dessert would be perfect to serve with holiday baked goods and chocolates, which seem to mysteriously accumulate at this time of year...

Pistachios, Chocolate,  Candied Orange Peel, and Sesame Brittle were accompaniments


CANNOLI GELATO 

1.5 quarts of French Vanilla ice cream 
     (ice cream used to come in half gallons - now they are 1.5 quarts! - I recommend Breyers.)
1 1 / 3 cups good ricotta cheese 
     (recommend Italian brand Galbani, available at ShopRite - it's exceptionally smooth not grainy.)
3 ounces coarsely chopped bittersweet chocolate
     (I used Guittard chocolate bars, a good brand of chocolate makes a big difference!)
1 /  4 cup candied orange peel, diced
     (in the baking or seasonal aisle of the supermarket - or you can make your own.)
1 / 4 cup coarsely chopped pistachios,  preferably unsalted
1 / 2 tsp. vanilla
1 / 4 tsp. cinnamon

1. Chop or scoop the ice cream into pieces and let soften in a large bowl about 5 minutes, just until soft enough to mix.  
2. Add the ricotta and mix well.  This "deflates" the air in the ice cream and makes it more like Italian gelato.  
3. Add the rest of the ingredients and mix well again, smoothing the top.  Cover with plastic wrap (to prevent ice crystals from forming) placed directly on the surface of the ice cream.  
4. Freeze 30 minutes or until very cold but not frozen solid; the gelato should be served soft and creamy, not rock hard. 

Have fun and serve with accompaniments like cookies, candied orange peel, brittle, and/or chocolates!
  
Note:  If making in advance and frozen hard, thaw in refrigerator for 20 to 30 minutes, or turn out onto a cutting board, then cut the gelato into pieces and mix for a minute or two until you get a soft-serve consistency.

Adapted from Restaurant Favorites at Home by the Editors of Cook's Illustrated Magazine.

Wishing you great food, fun, and friendships this holiday season,
Diane

Tuesday, September 16, 2014

Bite Club - New Foodie Book Club

Come to Bite Club TODAY, Tuesday, September 16!

The new #foodiebookclub at #sbpl14:

Bite Club is a new book club for people who love to talk about cooking and/or eating!  Each month we will discuss a new food theme and its corresponding cookbooks. Meetings will take place on the third Tuesday of each month from 7 to 8:30 in our Cafe (make two sharp rights after you enter the Library).


This is how it works:  Starting the 15th of the month, come to the Information Desk in the library to choose and take out ONE of the cookbooks we have set aside for you.  At home, peruse it, cook from it and and then come to the meeting on the following third Tuesday of the month to share your opinions and experiences.  (Return your book, and you can pick up the following month's selection at the Tuesday meeting.)


If you wish, bring in something you've made to the meeting; but please, don't feel obligated to bring something.  We just want you and your opinions to be there as a part of our "foodie" community!   We will provide a "bite" of something that we have made and you can weigh in with your instant review of what you're tasting. If you can, photograph your creations and we may post them on our blog.  If we have time, we may demonstrate a cooking technique or tip.

This book club is for you if you love talking about (thinking about, obsessing about?) good food.

September's theme:  Cooking Seasonally with the cookbooks of Alice Waters of Chez Panisse in California.
Waters' cookbooks give simple and delicious guidelines for preparing fresh local ingredients, perfect for the bounty of late August and early September.  

October's theme:  In Search of Flavor with the cookbooks of Ina Garten, the Barefoot Contessa
November's theme:  Classic American Cooking with cookbooks by America's Test Kitchen and Cook's Illustrated Magazine
December's theme:  Holiday Baking with various authors
Please join us as we get together with fellow foodies and talk about one of our favorite subjects!
Diane Whitman
Reference Librarian
#whitlibrarian

Thursday, June 26, 2014

If you Give A Mouse a Momofuku Milk Bar Compost Cookie...

 Compost Cookies are multifaceted: crispy, chewy, sweet, salty.
If You Give A Mouse A Cookie....

Sweet, but not easy, Compost Cookies (do you love that name?)  are the kind of cookies you need to make a project out of.  Because if you're like me, first, you ate all the potato chips before you found the time to make them. Wait, what? Cookies with potato chips?  Not only that, there's more, lots more, including ground coffee...!?

The next time, you bought the chips and the pretzels, but you didn't realize you needed milk powder, and glucose (see below for source!).  And then finally, you need butterscotch chips, not just chocolate chips (and make those mini chocolate chips, by the way) to make these danged things.  Oh, and that finally you got organized and read the entire recipe and saw that you actually need to make a graham cracker crust first (yes, FIRST, you have to make a recipe in order to make the recipe) and you don't have any graham crackers on hand, of course.

Hmm, it's slow going, but I did it.

The reward?  Here are some of the reactions to these amazing cookies that have it all: 

"These are the best cookies I think you've ever made!" ( from my son Andy). (And I've made a lot of good cookies through his 22 years!)

"They have what in them?  Potato chips and ground coffee?  I don't think I want one." (from our neighbor's son.)  Then, after trying one:  "Can I pay you to make these for me?" (Thanks, Dirk!)

"These are even better than the ones they make at their store in the city!" (from our other neighbor's daughter Liz, who lives in Manhattan).  Wow, Liz, thanks! Maybe because they were fresh and warm out of the oven?

No matter.  Make these cookies if you have a cookie monster in your life, or if you are one.   But just plan ahead.  You'll thank me later.


Compost Cookies are complicated!
 
Click on the link below for the amazing Momofuku Milk Bar Compost Cookies:
http://milkbarstore.com/main/press/recipes-and-how-tos/#compost

Some things I learned in making this recipe three times:
  • Cream the butter and sugar together for the full amount of time in a stand mixer, like a Kitchen-Aid - a portable mixer will not work.  
  • Not only should the dough be refrigerated ahead of time, but the baking sheets should be also, otherwise the cookies will brown too quickly. (I made this mistake.)
  • You can double the recipe, and the cookie dough ages well for 1 or 2 days, just be sure the baking sheets are refrigerated too, as above. (Especially helpful if you want to prepare the dough today, and bake the cookies off tomorrow, which you may want to do, since they take so darn long to prepare!)
  • Use Cape Cod brand potato chips which are sturdy and Herr's mini pretzels.  
  • You can buy milk powder in any grocery store.
  •  Glucose can be found at Michael's with the Wilton cake decorating supplies.   
You can take out Christina Tosi's cookbook, Momofuku Milk Bar, from our library's intralibrary loan program.  What a fun book to cook from or even just to read. (Christina Tosi recently appeared as a judge on the Food Network's show "Chopped".)

The renowned Momofuku restaurant group in New York City is run by David Chang, who hired the talented Christina Tosi to work on the management side of his business, but who was always baking and bringing in unusual desserts for the staff.  David prevailed upon Christina to create desserts for his restaurant with the evolutionary end result being the creation of the stand-alone baker(ies - there are now two) Momofuku Milk Bar from whence this cookbook came.

By the way, Momofuku means "lucky peach" in Japanese.
Also, if you love to cook or just eat, sign up for my cooking demo/and class, the Science of Cooking, here in the Library on August 5th, Tuesday, from 1 - 3, sponsored by the Adult Summer Reading Program.

We will be cooking, tasting, and learning about the Science of Cooking using Jersey fresh fruits and veggies.  Sign up on our Events Calendar - hope to see you there!

Diane Whitman
@whitlibrarian
Reference Librarian
With Apologies to "If You Give a Mouse a Cookie..."
 

Saturday, May 24, 2014

Smitten Kitchen: Salad Days Start Here

What exactly does that mean - salad days?  I (erroneously) thought it's when you were young and poor and all you could afford was salad.  But with the state of food availability in the United States, the affluent are the ones who eat salads all the time and the poor eat fast food burgers and pizza, so that didn't make sense...

It turns out that "salad days" refers to the time when you're young and GREEN, but not necessarily poor, although those three do oftentimes go together!

As we approach Memorial Day and the real beginning of grilling season, we still need some awesome salads no matter what we're throwing on the barbie, and whether we're in our salad days or not.

Here's a super easy, inexpensive and delicious salad that you can make with your eyes closed - well, not exactly, unless you're one of those TV chefs who can chop without looking.

Photo by the Smitten Kitchen


Vinegar Slaw with Cucumbers and Dill 
adapted from the Smitten Kitchen by Deb Perelman

1 medium head green cabbage
1 seedless cucumber (the kind wrapped in plastic where you can eat the peel because it's so thin)
2 Tablespoons of chopped fresh dill
1/2 cup white wine vinegar
2 Tablespoons of kosher salt
4 teaspoons of sugar
1/2 cup cold water

Core and thinly slice the cabbage and put in a large bowl.  Thinly slice the cucumber - no need to peel, and add to bowl.   In a small bowl, whisk together the rest of the ingredients.  Pour over the veg.
Best when marinated for an hour or two in the fridge.

Leftovers keep well, and this salad is great with anything grilled - the acid in the vinegar offsets and balances the richness of the meat.

Feel free to substitute and add:  for example, instead of cukes, use green apples or blueberries (yes, it totally works with this), or carrots.

Find The Smitten Kitchen in our Library now:  call number 641.5 PER, and enjoy the salad days of summer!

Diane Whitman
Reference Librarian
Twitter @whitlibrarian

Saturday, April 26, 2014

Food 52 Cookbook + VB6 = #awesomedeliciousness

Food 52 Cookbook + VB6 =  #awesomedeliciousness

French onion soup - something that sounds so appealing on a menu, but no, how could you possibly eat that plus an entree if you've had all that cheesy goodness to start?  Way better to make it at home.  And I have the perfect recipe for you - from the Food 52 Cookbook  Then have a salad after and you can still feel virtuous.


What's even better is that this French onion soup is dead easy to make with a store bought stock, but it becomes totally transformed into the best restaurant quality when you make your own.  Don't be scared off - if you can turn on your oven and roast some veg, you've got it in the bag.  And the stock is totally vegan, if you care, or even if you just want to eat more vegetables.

When I was in my twenties, I served French onion soup to two vegetarians, not realizing that the beef stock I used was not ok!  They loved the soup, and then confessed that they were sick later.  Oops!  I wouldn't make that mistake today...Here's how to make a great all veggie stock according to Mark Bittman's cookbook VB6:


Fast and Flavorful Vegetable Stock , Slower Variation
adapted from Mark Bittman's The VB6 Cookbook

2 medium or 1 large onion, quartered
4 carrots, cut into large pieces
2 celery stalks, cut into large pieces
1 pound button mushrooms, washed but left whole
4 - 8 whole garlic cloves, unpeeled but crushed
1 bunch fresh parley, including stems
4 sprigs fresh thyme, or 1 tsp. dried thyme
1 teaspoon whole black peppercorns
4 bay leaves
1/4 cup tomato paste
1/4 cup soy sauce
1/2 teaspoon salt
Salt and freshly ground black pepper to taste

Preheat oven to 450 degrees.  Roast the veggies - onion, carrots, celery, mushrooms and garlic on a half sheet pan or roasting pan lined with foil (no clean up!), for 30 - 45 minutes or until lightly browned.

Put the roasted veggies and everything except for the final salt and pepper in a stockpot with 3 quarts of water.  Boil, then lower the heat and simmer for 30 minutes to an hour.  (The longer it simmers, the deeper the flavor.)

Remove from heat and strain out the vegetables.  Salt and pepper to taste.

Keeps for a week in the fridge and 3 months in the freezer.  (Use for everything and anything  calling for stock!)


Now on to the French Onion soup of your culinary dreams:

French Onion Soup
adapted from the Food 52 Cookbook by Amanda Hesser and Marrill Stubbs

3 Tablespoons butter
2 Tablespoons olive oil
4 - 6 cloves garlic, crushed and peeled
3 lbs. onions, sliced
Salt and freshly ground pepper
4 sprigs fresh thyme
1 bay leaf
6 cups vegetable stock, preferably homemade (or beef stock)
2 cups red wine, or beer
To serve:  2 slices crusty bread for each person
Cheese - can be sliced deli provolone, or better:  1/2 cup each gouda, gruyere, and parmesan mixed together OR see vegan variation below.

In a large stockpot, melt the butter and olive oil.  Add the garlic and cook slowly for 5 - 10 minutes until caramelized.  Add the onions, large pinch of salt, a few grindings of pepper, the thyme and bay leaf and stir. 
Cook over medium/low heat until the onions are very soft, about 20 minutes.

Pour in the stock and wine or beer, bring to a boil, and simmer, uncovered for 1 - 3 hours.  Taste and add more stock and/or salt and pepper as needed along the way.

To serve, put one slice of bread in the bottom of a deep bowl.  Add a ladleful of soup.  Then take one additional slice of bread for each person, and top with cheese.  Toast that bread in a toaster oven until melted.  Place the cheesy bread on top of the soup.

Be transported to a happy place.

(For a vegan variation with no apologies, sprinkle the second piece of bread with panko, salt, LOTS of freshly ground black pepper, and a drizzle of olive oil.  Toast as above, and drop into the soup.)

Find these cookbooks and more in our own Library, or our member libraries.  Did you know you can use your South Brunswick card at any of our member libraries, which are almost all the libraries in Middlesex County? What's more, you can have books brought directly to our library from those libraries instead.  You can do this online, or call us at the Reference Desk at732-329-4000 extension 7286.

Diane Whitman
@whitlibrarian
Homemade stock convert
Reference Librarian
South Brunswick Public Library

Friday, March 28, 2014

Milk and Cookies, Twitter and Bacon

Just as I was getting ready to teach my Twitter class* here at the Library, I saw this and laughed: "Bacon: the duct tape of food," tweeted by chef Michael Symon.  So true.  It's the all purpose fix-up for food that needs a little help.

Amazing when used well, but often overused, sometimes overpowering all else with its smoky salty flavor.  I admit that I have fallen under the spell of this seemingly magical ingredient and used it in some delicious preparations.  To wit:  bacon butter and bacon maple biscuits.  One bacon addition which I disliked:  Bacon Cookies from gourmet cookie shop The Milk and Cookies Bakery in the West Village of New York City.


Download this e-book from our Library website!
However, way over on the plus side for me were the Chocolate Chip Cookies from the very same Milk and Cookies Bakery.  They absolutely do not need bacon to be delicious. They are memorable and perfect just the way they are. In fact, I booked my family on a food tour of Greenwich Village on the basis of my foodie hair stylist Stacy rhapsodizing about those cookies. (Our tasting tour completely confirmed their wonderfulness.)

Best of all in my opinion is you can make these cookies anytime yourself using the Milk and Cookies bakery cookbook. We have it available at our Library as an electronic book.  (Just use your library card, then you can read it in your browser, or download it to your computer,  e-reader or mobile device.  Call us at 732-329-4000 ext. 7286 if you need help. Choose Libraries of Middlesex Automation Consortium as your lending library from the drop down menu.)

Photo from the The Milk and Cookies Bakery
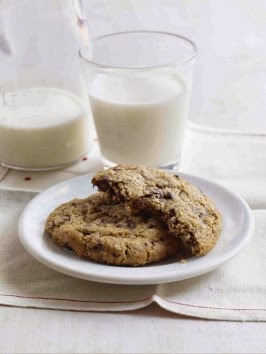
Back to those Chocolate Chip Cookies - 1. They have an amazing crunch due to the addition of oatmeal that's ground up and mixed into the batter.  2. They have great depth of chocolate flavor from two kinds of chocolate: bittersweet chocolate flakes (make these in your food processor or blender) which are streaked into the batter, and large semisweet chocolate chunks (not wimpy chocolate chips).  And 3. They have both a  crunchy exterior and a soft middle.

Result - cookie nirvana.  Cookies even a bakery would be proud of. Or as my friend Barb said:  "You should sell these!".

I'll let you in on a few secrets:  these cookies require a little attention to detail, but it's totally worth it.  The first time I made them I brought them in to the Library and they were pretty good - see items 1. and 2. above.  But the texture, well, it was not quite right - the cookies were too big and too crunchy.

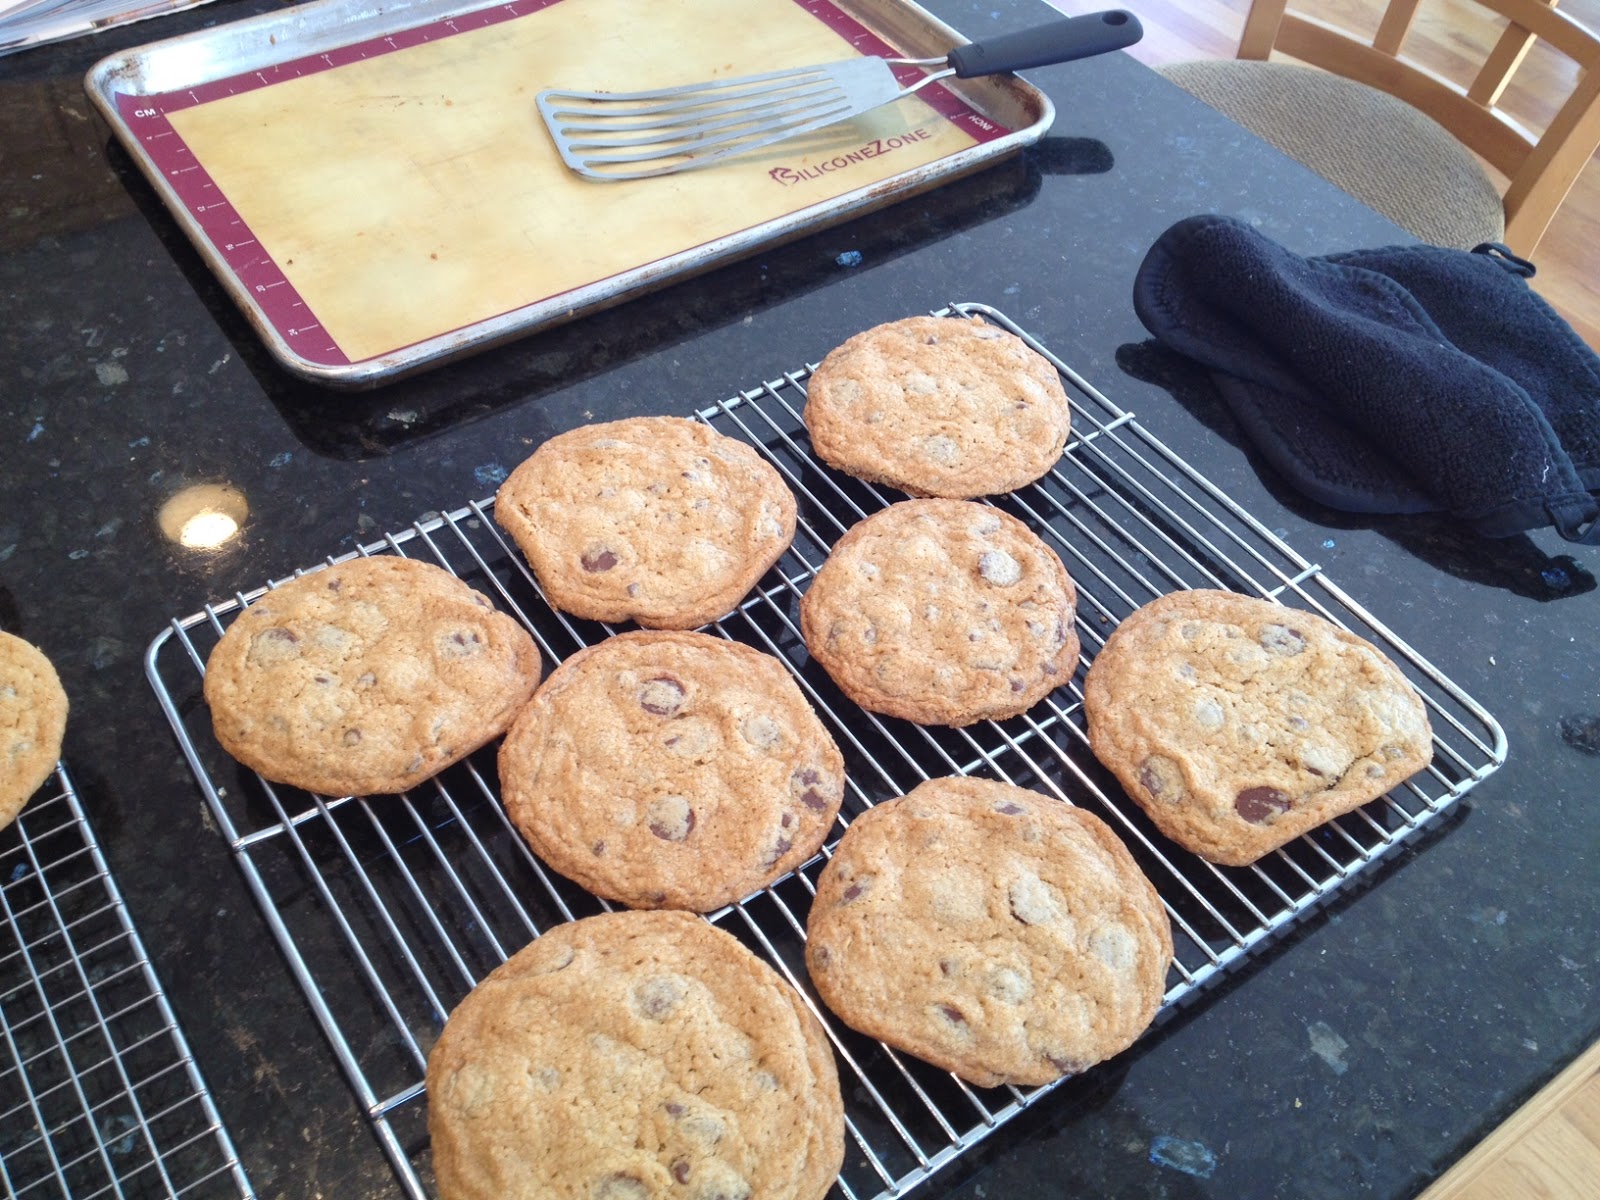
First attempt:  too big, too flat, too crunchy.
Second attempt:  gone before I remembered to take a picture. But totally like the first photo above.
I was determined to make them taste as great as the ones we'd had at the Bakery, especially since now both my daughter Kate and Stacy had raved about them, and I wanted to surprise my daughter with them for her birthday.

The second time I made them was a couple days later and I changed three things:  I shaped them into 2 inch (not 2.5 inch) hockey-puck-shaped rounds and then, before I baked them, I chilled the shaped rounds on the cookie sheets in the refrigerator for about 30 minutes, and finally, I was careful to take them out of the oven when they were firm on the outside but still soft in the middle.

We had them as dessert after Sunday dinner, and then I gave the rest to Kate to take home for a belated birthday treat (make that really belated - her birthday was in June!)  I asked her to share some with Stacy who consequently texted:

Stacy:  I LOVE YOUR MOM!
Kate:  They pretty much taste just like the cookies haha.
Stacy:  "They taste EXACTLY LIKE THEM!".

So here you go, click here for the link for the Milk and Cookies  Chocolate Chip Cookie recipe, and just be sure to follow the caveats above.  And please don't add bacon.

Diane Whitman
@whitlibrarian
Reference Librarian
Persistent Baker

P.S.  I read some of the comments for this recipe so there's one more thing to be sure to do:  when you cream the butter and sugar, be sure to use a standing type mixer (like a KitchenAid), not a hand held mixer, and when the recipe says "beat until very light and creamy", this means to be sure and beat it for 5 - 6 minutes until the color changes to very pale yellow and the mixture is noticeably light and fluffy!

* Check the Event Calendar for the next Twitter class, scheduled for early May 2014.

Friday, March 21, 2014

VB6 - Mark Bittman's Eat Vegan Before 6:00

I love vegetables, although I can't say I've never met a vegetable I didn't like - I cooked collard greens once and that was a disaster - too bitter for me - dumped the whole bowlful right in the garbage after everyone at the table had one bite and gagged - but I like almost every other veggie.

Eating vegetarian and having a meatless meal is no hardship in my book, especially now that spring is here and we're getting better produce in the markets.  But eating vegan is beyond the pale - what, no milk on my cereal?  no cream cheese on my bagel?  no parm on my eggplant parmesan? - that would be really tough. So Mark Bittman, cookbook writer, New York Times food columnist and wholesome food advocate, had his work cut out for him to convince me not only to go vegetarian, but vegan for breakfast and lunch.  On the plus side, there is a reprieve for dinner.

Chickpea Ratatouille: vegan, easy, delicious, make this tonight!

That's the conceit of Bittman's latest cookbook VB6, Eat Vegan Before 6:00. His reasons for it are health and long-term weight loss.  As the aforementioned vegetable lover, I thought, OK, sign me up. (Heaven knows I'm not losing any weight cooking from the Bouchon Bakery cookbook! Sadly.)

At dinner, you don't go wild, but are eating entrees which are vegetable laden, and with much smaller quantities of meat, fish and dairy, which I prefer anyway.  I took the leap and tried a number of recipes, and I must say, I was duly impressed.

Big winners, mostly from the dinner category:

Fish Stew:  taste of Provence in a bowl
Fisherman's Stew,  a classic Mediterranean vegetable and seafood stew, made even more awesome if you have the time and inclination (yes to both on my part - I live to eat and cook!), by using Bittman's recipe for Fast and Flavorful Vegetable Stock, which in itself is worth making and adding to anything that calls for vegetable, chicken or beef stock.  (French Onion Soup  from The Food 52 Cookbook by Amanda Hesser and Merrill Stubbs made with Bittman's stock was to die for - but that's a different post.)

Vegetable stock to be
D.I.Y. Flatbread, a whole wheat bread that you can form into sandwich bread, crusty bread, breadsticks or pizza.  Easy with a food processor and the hands on time is minimal.  Made pizza with ricotta, balsamic caramelized onions, and butternut squash, and another with ricotta, pesto, asparagus and scallions.  Great, easy, from scratch whole wheat recipe where the bread was worth eating. Click here to see Mark Bittman's video and the recipe.
Ricotta Pizza: butternut squash, balsamic caramelized onions - great combo.

Shrimp Tabbouleh, your classic bulgur and veggie salad, but way heavier on the veggies.  Keeps well in the fridge, too, especially if, like me, you hide the leftovers in the back of the refrigerator for yourself. (Guilty as charged, sorry.)

Eggplant Un-Parmesan, eggplant parm and, amazingly, you don't miss the cheese.  First, the sauce is very flavorful and then Bittman cleverly tops it all with a salty, peppery breadcrumb mix drizzled with good olive oil so that you don't miss that hit of parmesan at all.

No parm, no  problem.

Chickpea Ratatouille, a ratatouille recipe that is not only great tasting, but takes virtually no time because you roast all the veggies together in the oven.  Well, you do have to cut them up, but I love that - you're using all those beautiful veggies and then concentrate on the zen-ness of cutting them up evenly (ok, maybe that's only zen for me?). If you put them on a low rimmed half sheet pan lined with heavy duty aluminum foil amd then a sheet of non-stick foil, there's no scrubbing up afterwards either.

Near misses:

Made the Carrot Candy which was fun and ludicrous at the same time:  a pound of carrots cooked down to a tiny bowlful of little bits, which tasted more like vegetable leather than any candy I've ever had.

An entire pound of carrots reduced to tiny bits!
The Chocolatey Pineapple Kebabs were ok, pineapple dusted with cocoa powder and baked in the oven. These were okay, a little bitter, and people weren't thrilled with them.

Frozen Banana Bonbons - good, but this preparation is nothing new.

Creamed Mushrooms on Toast - cream replaced by white beans buzzed in a food processor or blender made a nice substitution.  Served over toasted whole wheat bread for dieters and slices of toasted baguette drizzled with olive oil and rubbed with garlic for the indulgent. Can defeat the vegan-ism by topping with a little grated Parmesan.  Oops.

Following is the recipe I don't want you to miss because it's easy and perfect for an early spring dinner now that the eggplants and zucchinis are coming in the markets.  I know, I know, they're not local, but they're a nice break from root vegetables after a long, snowy, winter here in New Jersey.  And I think we deserve that, don't you?


Chickpea Ratatouille
adapted from Mark Bittman's VB6

1 lb. plum tomatoes OR 1 28 ounce can whole tomatoes, halved and drained, reserving the liquid (I like Muir Glen brand - and BTW whole tomatoes are generally better quality than diced in any brand)
1 lb. eggplant, cut into large chunks, 1 1/2 inches
3/4 lb. zucchini, cut into large chunks, 1 1/2 inches
1 onion, sliced
2 red or yellow bell pepper, cored, seeded and sliced
5 garlic cloves, peeled and halved
4 Tablespoons olive oil
1 teaspoon salt
Black pepper to taste
__________________
3 cups cooked chickpeas, or 2 cans, rinsed and drained
1 Tablespoon chopped fresh thyme or rosemary OR
1/2 cup chopped fresh basil or parsley (don't skimp here - with a dish this simple, you need fresh herbs)

Preheat oven to 425 degrees.  Line a large roasting pan or sheet pan with heavy duty foil and then a layer of non-stick foil.  Combine first 5 ingredients in the pan, drizzle with olive oil, salt and pepper, and mix.

Roast until veggies are lightly browned and tender, 30 to 40 minutes.

Scrape into a pot, add the chickpeas, reserved tomato liquid and fresh herbs and cook over medium heat until heated through, 5 - 10 minutes.


Wasn't that easier than any ratatouille recipe you've ever made?  Just as tasty too. Also totally satisfying with the addition of the chickpeas, and still vegan!

Find many more of Mark Bittman's cookbooks and great recipes here at the Library, and have fun this spring cooking with lots of fresh vegetables!

Diane Whitman
@whitlibrarian
Veg Advocate
Reference Librarian

Friday, February 7, 2014

Sweet Indulgence: Liddabit Sweets Hip-to-be Squares

Cornflakes for breakfast?   Not exactly: the other morning I could be found at my kitchen island crushing (not eating) cupfuls of cornflakes and combining them with Guittard milk chocolate and, yes, half a jar of Nutella. After spreading this delectable mixture in an 8 x 8 inch pan and popping it in the fridge for an hour, and coating the resulting bars top and botton with Ghirardelli dark chocolate:  Voila -  Hip-to-be-Squares a la the Liddabit Sweets Candy Cookbook.


Written with wry good humor by Brooklynites Liz Gutman and Jen King,  the Liddabit Sweets Candy Cookbook is the ultimate confection cookbook for someone like me who loves the thrill of making something sweet, delicious and at times, kind of challenging.

The recipe for Hip-to-be Squares appears simple, and if you decide not to temper the chocolate, it really would be.  But I have made chocolate candies before without tempering and the resulting chocolates inevitably are not the lovely, glossy showpieces I was hoping for, but chocolates that were dull and definitely not professional looking.  Liz and Jen and the Liddabit Sweets Cookbook to the rescue!

Not wanting to go the easy route, I skipped over the instructions for "Cheater's Chocolate Coating " and went directly to the "The Best-Tempered Chocolate You Ever Met" instructions.  Last Christmas I had asked for this cookbook and a chocolate thermometer to go with it so that I could do justice to these recipes.   It's over a year later and I finally got around to making one of the recipes, but for the life of me I could not find that thermometer.

No matter, there were instructions in the book for judging the temperature of the chocolate by putting a drop on your lip and deciding whether it was distinctly warm or distinctly cool.  So I went ahead without the doggone thermometer.

That worked just fine, the filling itself was easy first of all, and the tempering was fun, albeit a little time consuming.  I confess I did have to improvise a little because I cooled the chocolate down too far and needed to slightly re-heat it to make it spreadable.

Sidebar:  tempering chocolate is taking bars or discs of chocolate (which already are in temper and shiny) and heating the chocolate to a specific temperature (dark chocolate to 108 degrees) and then cooling it down to another specific temperature (90 degrees) all the while beating it like crazy to aerate and cool it before using it in your recipe.  The resulting chocolate should have snap and shine without any whitish "bloom" or chalkiness.

Forthwith, a photo of the completed chocolates, not absolutely perfect, but pretty good looking, and certainly mighty tasty.


I halved the recipe because the cost of good chocolate can be prohibitive, and I want to try some of the other chocolate recipes from this cookbook too!  Also, this recipe as originally written makes a giant batch: 117 one inch chocolates from a 13 x 9 pan.  I think it's entirely enough to make 64 one-inch chocolates in an 8 x 8 pan.

I've included tips along with the adapted recipe to make it easier for y'all.

Hip-to-be Squares, halved and adapted from the Liddabit Sweets Candy Cookbook

Yield:  64 one-inch square chocolates

For the bars:
generous 3/4 cup of chopped milk or dark chocolate, or chocolate chips (I used Guittard milk chocolate - 5 ounces)
1 1/2 generous cups of Nutella (14.5 ounces)
3/4 teaspoon of kosher salt or fine sea salt (if only regular table salt is available, use 1/4 teaspoon) - you can double this to get that salty/sweet flavor so popular now - I did!
1/4 cup mild vegetable oil such as sunflower or safflower
1 cup crushed cornflakes (I crushed about 2 cups of flakes in my Vitamix to yield 1 cup crushed - a food processor works well too)

For the coating:
1 1/2 cups or 9.5 ounces chopped dark chocolate ( I used half  Ghirardelli 60% chocolate and half 72% chocolate)
(For Cheater's Chocolate add:  1/4 cup vegetable oil)

Line the bottom and 2 sides of an 8 x 8 inch baking pan with parchment paper.  Line with a second piece of parchment over the bottom and remaining 2 sides.


Melt the 3/4 cup of chopped chocolate in a large bowl in the microwave (zap in 20 second increments, stirring in between).

[Alternate method: add water to about an inch depth to a medium saucepan, and bring to a simmer.  Place a large metal bowl over a medium saucepan filled to a depth of about an inch with simmering water.  Stir frequently until all the chocolate has melted. Remove from heat.]

Add the Nutella to the melted chocolate and stir until blended.  Add the salt, oil, and crushed cornflakes, stirring again until well blended.  Turn into the parchment paper lined pan, smoothing the top.  Refrigerate for 60 to 90 minutes, until firm.


Melt and temper your dark chocolate.  For full directions for tempering chocolate with a thermometer:  click here (if you don't have a thermometer, just use the "lip test" described above).

[Alternate: for cheater's chocolate:  melt the chocolate over simmering water or in the microwave.  Off heat, gradually beat in the oil.  Let cool for 15 to 20 minutes until about the thickness of warm hot fudge.

Turn out the the candy onto a parchment lined cutting board and remove the parchment.  Coat the bottom of the bars with about 1/4 to 1/2 cup of the melted chocolate, spreading with an offset spatula if you have one (or just use a knife).  Let set up - anywhere from 2 to 5 minutes. Turn right side up.  Coat the other side with the rest of the chocolate.  Let set only about 1 minute, and quickly, using the tines of a fork, make wavy lines in the chocolate before it sets completely.


Let set again about 2 minutes.  Then score just the top layer of chocolate into 1 inch squares.  Let set another 5 minutes, and then cut through the candy completely into 1 inch squares.  Be sure to cut through completely to the bottom layer of chocolate in order to get neat squares.

Store in an airtight container at cool room temperature for up to 3 weeks (doubt they will last that long!).


Good luck, be sure to share, and get cooking with some great cookbooks from our Library!

Diane Whitman
@whitlibrarian
Reference Librarian

Thursday, August 29, 2013

What Vanilla Pudding Wishes it Was...Plus Our New Cafe


Have you made vanilla or chocolate pudding from a mix recently? Childhood memories must be playing tricks on me: those mixes just do not taste as good as I remember them.

Back in the day, it was dinner at 6 – don’t be late! – and if we had dessert on a weekday, it was usually watermelon or peaches in summer, and in winter, jello, canned peaches or pudding, served up in footed dessert cups.  But that was only if you ate everything on your plate, of course.

Sometimes the vanilla pudding was folded together with bananas and vanilla wafers in a square Pyrex baking dish.  And always, whipped cream from a can was available to squirt on top. Simple tastes for simple times.

Following is a recipe for pastry cream which undoubtedly tastes better than those long ago desserts, although it can never surpass the warm memories of time spent at the family table, admonitions of  no elbows on the table! no talking with your mouth full! no interrupting! notwithstanding.

There is a richness and depth of flavor from the combination of half and half, egg yolks, pure vanilla and fresh butter in this pastry cream which simply can’t be duplicated in pudding mixes.


Alien invasion at the Library!
Coffee and books - a great combination...


Grover’s Mill Coffee House in West Windsor, known for great coffee - they roast the beans themselves! -  just opened a café in our Library, and I was honored to make the cakes for their Grand Opening:  white cake with almond scented pastry cream, and whipped cream frosting.  The cakes, never from a mix of course, were enormous.  The ingredients tally: 48 eggs, 9 sticks of butter, 3 quarts of half and half for the pastry cream, and another 3 quarts of  heavy cream for the whipped cream frosting (certainly not from a can!). 

One customer came to the desk saying, “I just had to come over to see who baked this, because I took one taste and thought, “A real person baked this, not a bakery!” “.  

I used The America’s Test Kitchen Family Baking Book (in our Library!) for their pastry cream recipe.   Pastry cream is a very straightforward, but not necessarily “easy” preparation.  You have to follow the directions exactly (don’t run out of the kitchen to do something else in the middle!), but if you do, your pastry cream will be perfect. A little technique here goes a long way.

Pastry Cream adapted from America’s Test Kitchen Family Baking Book

2 cups half-and-half
½ cup granulated sugar, divided as follows:  6 Tablespoons , plus 2 Tablespoons
½ teaspoon kosher salt, (or ¼ teaspoon regular table salt)
5 egg yolks
3 Tablespoons cornstarch
4 Tablespoons butter (1/2 stick), cut into 4 pieces
2 teaspoons vanilla extract
½ teaspoon almond extract (optional)


In a medium saucepan, heat up the half and half, 6 Tablespoons of the sugar, and the salt together over medium high heat, stirring occasionally to keep from burning or sticking to the pan.  In the meantime, in a medium bowl whisk together the egg yolks, 2 Tablespoons of sugar, and cornstarch.

When the half and half just comes to a simmer, ladle out one cupful and add in a slow steady stream to the egg yolk mixture, being sure to whisk constantly (a helper could come in handy here – or just nest your bowl in a damp kitchen towel so the bowl doesn’t move). 

This gradual addition of the hot liquid brings up the temperature of the egg yolks slowly so the eggs don’t turn into hard bits of scrambled egg.

When that cup of hot half and half is completely incorporated, slowly whisk the egg mixture back into the bowl of the still simmering remaining half and half.  Then lower the heat to medium and whisk until thickened and a few bubbles pop slowly on the surface of the pudding.

Immediately remove from heat and add in the butter and vanilla extract (and almond extract, if using).

Transfer to a bowl and cover the top with plastic wrap placed directly on the surface of the cream (or a piece of parchment paper if you prefer not to have plastic in contact with your food).
Cool for 3 hours.  (Can be made a few days ahead of time.)

Besides using pastry cream for a great cake filling, make a quick dessert by combining with bananas and vanilla wafers for a retro combination; mixing with peaches and gingersnaps; or pairing with blueberries, raspberries and amaretti cookies.  Adding a flavored liqueur like framboise (raspberry), Grand Marnier (orange), or Amaretto (almond), when adding the vanilla extract would be a nice addition too, along with a dollop of fresh whipped cream.

After consuming the fake “pastry cream” which most bakeries serve, people forget how delicious simple things made from scratch can be.   This is one of those quintessentially old fashioned recipes that makes you feel like you’ve re-discovered an old friend, even if you’ve only ever had the boxed pudding mixes.

Try this with coffee made from the freshly roasted coffee beans now available in our new cafe - the Grover's Mill Coffee House at the South Brunswick Public Library, and enjoy with a good book!

Diane Whitman
Twitter @whitlibrarian
Reference Librarian
Grover's Mill Coffee Loyalist


Friday, August 9, 2013

Rules for Cinnamon Doughnuts


Rules for Cinnamon Doughnuts

Rules are made to be broken.  I agree with that, but only sometimes.  People can be divided into two camps – rule followers and rule breakers.  Me:  rule follower - I have to walk against the traffic and bike with the traffic.  If you’re walking with me in the neighborhood, I’m uncomfortable walking on the right, so just so you know?  We’ll be staying to the left.

Such rules make sense, and are intended to keep you safe.

With recipes it’s different, safety is not the issue (unless you’re talking about sanitation and safe cooking/storing temperatures, about which I am even more of a stickler).  When cooking, most recipes can be used as guidelines, whereas when baking, most recipes need to be followed to the letter. 

Not so with this recipe for Ina Garten’s Cinnamon Baked Doughnuts baked in a doughnut pan - baked, not fried, in a nod to health, a very slight nod, almost an imperceptible one because after baking, these doughnuts are dipped in melted butter and then rolled in cinnamon sugar. And because of that they are glorious – especially when still warm from the oven. 

You don’t actually need a doughnut pan – bake these as I did in a standard muffin tin.  I dislike having dedicated one-use items in my kitchen – too much clutter - and prefer to have versatile, good quality basic items instead.  The resulting cakes did not look like Ina’s but were certainly just as good tasting.

Not so beautiful but delicious!
Do I feel like I got away with something?  Maybe.  (Full disclosure - I actually used a silicone baking mold that someone gave me for Christmas - the muffins stuck, I recommend using a standard metal muffin tin, so yours will look better than these!)

This morning I heard a snippet of a BBC radio broadcast and the phrase “the allure of bending the rules” jumped out at me.  I can see where rule bending might be an attraction, more for some people, less for others. 

For me, my Catholic angst prevents me from reveling in this allure and I much prefer to stay on the side of the rule followers, walking on the left, biking on the right, but occasionally baking in muffin tins instead of doughnut molds…

Cinnamon Baked Doughnuts  from Ina Garten’s Foolproof

2 cups all-purpose flour
1 ½ cups sugar
2 teaspoons baking powder
1 teaspoon ground cinnamon
½ teaspoon ground nutmeg
½ teaspoon kosher salt (or ¼ teaspoon table salt)
1 extra large egg, lightly beaten
1 ¼ cups whole milk
2 Tablespoons unsalted butter, melted
2 teaspoons vanilla extract

For the topping:
1 stick (8 Tablespoons) unsalted butter
½ cup sugar
½ teaspoon ground cinnamon

Preheat oven to 350 degrees.  Grease and flour a 12 cup muffin tin, or spray  with Baker’s Joy (baking spray with flour).

In a large bowl, whisk together the flour, sugar, baking powder, cinnamon, nutmeg and salt. 

In a small bowl whisk together the egg, milk, melted butter and vanilla.  Pour the wet ingredients into the dry until just combined.

Portion into 12 muffin cups.  Bake for 15 to 20 minutes, checking at 15 minutes, and removing them when a toothpick comes out clean.  Let cool on a rack for 5 minutes.

Melt the butter.  Mix together the sugar and cinnamon.  Dip the muffins in the butter, then coat with the sugar. 

Best when warm.

The more experienced you are with cooking, the more you know some of the unwritten rules of cooking, and will follow them in all your recipes.  Here’s a few I see broken often:

Don’t crowd the pan when you’re sautéing. Take the time to cook in two batches or more. If you don’t, the food will steam instead of fry, and will never get a nice brown sear.  

When you’re using a gas grill, preheat the grill with all burners on high with the lid closed for 15 minutes.  Then change the setting to the desired temp and cook your food. 

Salt your food to taste during cooking, it won’t be the same if you only add salt at the end. 

When a recipe says sift together, it’s perfectly ok to whisk all the ingredients together instead. 

When baking, switch your pans left the right, front to back, halfway through the baking time.  This ensures more even cooking.  Just be quick, lest your oven cool down too much.

Diane Whitman
Reference Librarian
@whitlibrarian
Rule Enforcer


Friday, August 2, 2013

Zucchinis and Twitter

Zucchinis and Twitter

It's that time of year again when good looking zucchinis are in every New Jersey market, and you can't help buying them because they look so fresh and healthful.  If you have a garden you probably have been resorting to dropping zucchinis off at neighbors houses. (Ringing the front door bell and running? -  well, maybe not that bad.)

In any case, here's a yummy way to not only use up but to enjoy zucchinis (and/or any kind of summer squash) in a versatile and delicious preparation:  Zucchini Butter.

(from Food 52's website)
Zucchini Butter is perfect warm and unctuous slathered on bruschetta, as a dip for crackers, carrot sticks or even zucchini sticks.  Or you can just do what my friend Carol did and simply eat this out of the bowl.  She proclaimed this "the best zucchini I ever ate", and my friend Barb texted me the next day for the recipe to make for her weekend guests.

This comes from the website Food 52, which I initially found because it sponsors and publishes an awesome competition for the best cookbooks of the year, but which I keep in my Twitter feed because it showcases some of the best food trends and recipes out there.  (www.food52.com, @food52 on Twitter)

Did I mention that Zucchini Butter is easy, cheap, and would keep well in the fridge for a day or two if all of it is not eaten immediately?

Yep, you should buy some zucchinis right now and have this tonight.  Disclaimer -  this may have been fantastically delicious because of the great quality of the ingredients I used:  fresh from the farm zucchinis and onion, flaky Maldon sea salt, black pepper imported by a friend from India, and olive oil purchased from Natirar Restaurant which they import themselves from Tuscany.  Which all goes to prove that sometimes great cooking is really just great shopping.

But don't despair if you don't have these same exact ingredients - the silky smooth "buttery" texture that the zucchini takes on from cooking down and having its flavors concentrated will still be present and wonderful; if not that elusive sweetness and freshness that you get from cooking with just picked ingredients.


Jennie Cook's Zucchini Butter adapted from Food 52's Twitter Feed, from July 24, Kristen Miglore

1/4 cup good tasting extra virgin olive oil
1 small white onion (OR 2 shallots, OR 3 large cloves of garlic - in fact, anything from the allium family, to give that onion-y flavor)
Sea salt, if you have it, kosher or regular salt if you don't
Freshly cracked black pepper
3 or 4 medium zucchini (1.5 to 2 lbs.), grated to make anywhere from 6 to 8 cups (can mix in yellow summer squash too!)

Saute the onion (or shallots), sprinkled with salt and pepper, in the olive oil in a large skillet on medium low heat for 5 or 10 minutes until softened and translucent.  (If using garlic, cook only for 30 - 60 seconds.)

In the meantime, squeeze out handfuls of the zucchini to rid the squash of excess water, and then add all the wrung out grated zucchini to the skillet.  Add more salt, turn up the heat to medium high, and cook, stirring occasionally, for 15 minutes.  It's ok if the zucchini browns here and there, it will just add to the flavor.

Serve warm, or gently reheat if used later.  Yields about 2 cups.


Enjoy the bounty of the Garden State in summer!  And sign up for my All About Twitter class at the Library on Friday, September 27 from 12 - 1 to learn how to get connected.

Diane Whitman
@whitlibrarian
Reference Librarian
Jersey Girl/ Tweeter


Thursday, July 11, 2013

It's (truly) All Good


It’s  (truly)  All Good

I’ve been trying to find cookbooks that support the bounty of fresh, organic produce I’ve been getting from my CSA, Dogwood Farms (read – use up before it overtakes my fridge.)  Here are several I picked up at the Library.

The first one that caught my eye was appropriately called The Farm by Ian Knauer.  This one had lots of recipes for seasonal produce but what really stood out to me in this cookbook were the number of recipes that included bacon!  Truth be told,  I like bacon as well as the next person, but lately it has been so overused that chef Michael Symon recently tweeted:  “Bacon:  the duct tape of food.”  It’s almost like cheating – add bacon, and everything tastes great!

Besides the bacon, many of these recipes called for more cheese, meat and fat than I was comfortable with.  I was looking for recipes that were fresh and healthful, not just good tasting, and where the produce itself takes center stage.  Next.

Another promising candidate was Vegetable Literacy by Deborah Madison.  Here was a book that read almost like a primer for the professional cook.   In fact, its subtitle is “Cooking and Gardening with Twelve Families from the Edible Plant Kingdom with Over 300 Deliciously Simple Recipes.”  Each chapter contained its own little lesson about the growth habit of the vegetable, who its botanical cousins were and what flavors paired well with it.  The recipes were interesting but were often of the side dish variety, again, not quite what I was looking for. (I am soooo picky.)

Enter Gwyneth Paltrow’s new offering It’s All Good, and its recipes are exactly what I want to be making this summer.  Yes, it veers off into the realm of fervent veganism, as well as being gluten free, but you can look at this in two ways:  it might expand your culinary horizons, OR, you could just re-adapt the recipes back so that you use flour with gluten, regular sugars, add meats and cheeses, whatever, if you like.  (Cheating?  Well, nobody's perfect!  Except maybe Gwyneth...)

One thing I loved about this book is that the salad dressings are all phenomenal, plus they're different enough from one another that you could vary the salad ingredients and enjoy lots of different tastes to keep you happy all season.

If you are looking for a healthful, fresh way to cook that is also gourmet delicious, and truly easy, It's All Good is your book.  Great example, this refreshing peach basil summer smoothie combination that I bet you haven’t had before.  Wonderful for breakfast, I poured out two glasses full, but after one taste, I decided not to share and drank them both!  (Full disclosure:  I did make another batch for my husband, but it wasn’t quite as good, as the peach wasn’t as sweet and ripe.  So if you don’t have a giant luscious peach like I did, use two smaller ones, and decrease the lime to ½ a lime if they’re not dead ripe and sweet.)


Crazy Delicious Peach/Cucumber/Basil Lime Smoothie

1 large ripe peach, pitted, not peeled
1 cucumber, peeled
1/3 cup of fresh basil
1 lime, peel and pith removed
1 cup or so ice cubes

Coarsely chop up the first four ingredients, and add them to your blender in order.  Add  ice cubes.  Blend away.  Be amazed.


(If I hadn’t scarfed down the whole thing immediately, the glasses would have looked so pretty decorated with a peach slice and a basil leaf…!)

Can’t wait to see what I get this week from the farm!

Diane Whitman
@whitlibrarian
Gwyneth Fan

If you want to see what a CSA is about, check out their website:  dogwoodfarmsnj.com.

Friday, June 28, 2013

Sea Salt Magic

Sea salt caramel whipped cream...doesn’t that description make you want to go right out and eat some NOW?  (Me? Guilty!) The addition of salt - specifically large, flaky sea salt, totally elevates the flavor of the caramel whipped cream to something so beyond delicious, it's almost magical.

In our Library now!  Come in and check it out.

We're all familiar with the great combo of cake/berries/whipped cream which is strawberry shortcake, but  Caramel Fleur de Sel Whipped Cream takes this dessert to another level entirely - and guess what? It's easy, people!

Cheat and make this today with a yellow cake mix and it will be (almost) as good.  Make this now with strawberries and yellow cake, in July with blueberries and chocolate cake (love that), and in August with peaches, raspberries and white cake with a little addition of almond extract...(yum, can't wait for peaches - I love summer!).

Go for the strawberry version and scatter in some blueberries to make it colorfully Fourth of July festive.


This recipe hails from the fun book Relish by Daphne Oz from the daytime food talk show “The Chew”. Though not technically a cook book, more a lifestyle book, this recipe is a keeper.

I've changed up the directions so that each person adds salt on top of their own serving to taste: some may prefer more or less (and children none at all). Use Maldon sea salt or French fleur de sel if any way possible - it makes all the difference. (Am I being a salt snob? Yes, I admit it, but it really does...!)

(Notes: Caramel is simple, but can be tricky if you don’t watch it carefully once it starts to change color, so be vigilant. Also, sugar burns are intense – be careful not to get any on your skin.)

I couldn’t resist sharing this photo of our Strawberry Cake with Caramel Fleur de Sel Whipped Cream which my granddaughter frosted and decorated herself for my daughter’s birthday.
Devon's design.

Caramel Fleur de Sel Whipped Cream Frosting, adapted from Relish, by Daphne Oz

1/2 cup sugar

2 Tablespoons water

2 cups heavy cream, divided as follows: 3/4 cup heavy cream for the caramel, 1 1/4 cups for whipping

2 Tablespoons unsalted butter

1/8 teaspoon kosher salt

Maldon sea salt (or other large flake sea salt such as French Fleur de Sel) for sprinkling on each serving to taste
Cake
Berries

Mix the sugar and water in a heavy medium saucepan set over medium high heat. Stir until the sugar dissolves. Cook without stirring until the syrup turns medium amber, if you are using a candy thermometer, to about 355 or 360 degrees. Remove from heat and carefully whisk in 3/4 cup ONLY of the heavy cream, then the butter and kosher salt.

Pour the caramel into a small bowl and refrigerate (or freeze if you’re in a hurry – about 30 minutes) until cooled and thickened. (Can be prepared ahead to this point.)

Place the remaining cream in a large bowl and beat with an electric mixer until soft peaks form. Add the cooled caramel and beat until stiff. Decorate your cake with cream and berries. Have each person add salt to taste.

Be proclaimed the Wizard of Dessert Alchemy.

Diane Whitman
Twitter @whitlibrarian
Reference Librarian,
Powerless in the Face of Awesome Desserts


Tuesday, May 21, 2013

FPC at the CSA

I started off this past week reading Culinary Intelligence, The Art of Eating Healthy (and Really Well) by Peter Kaminsky.  His theory is that if you eat things with a high Flavor Per Calorie (FPC) ratio, then you will be eating less,  more healthfully, and will naturally lose weight. Ha!

He advocates eating the best of what's in the markets, so fresh fruits and veggies figure prominently. Sure, that works for weight loss as well as flavor, but how does that square with going to Murray's Cheese Shop in the city and buying all manner of delicious cheeses, very high in FBC, and then, of course, eating them?  Oh, OK, self-restraint has to figure in there too, I suppose.

My family and I took part in a Greenwich Village food and history tour for Mother's Day, where we were absolutely stuffed with all manner of fabulous meats (sopressata from Faicco's!), pastries (cannoli from Rocco's!), artisanal olive oils and vinegars (O and Co.'s basil olive oil and a mango balsamic vinegar drink!), and  breads (Tuscan baguette from Amy's! with Murray's cheeses!).  Afterwards, we came home to an evening with good friends for dinner, and of course enjoying some more of the goodies that I had purchased on that tour.

There really was no losing weight that weekend, although we ate some undeniably great food, high in FPC.  When my husband and I went on a tour of Italy two years ago, I did lose weight, because 1), I ate only things that looked exceptional (high in Flavor Per Calorie!), and, key difference, 2) we walked all day, every day.

The weekend progressed with Mother's Day dinner on Sunday, when we had Seared Scallops with Prosciutto from Tim Ferriss' The Four Hour Chef, prepared by my son-in-law and sons.  These were good, especially since I didn't do any of the work, but they were a bit bland.  Maybe next time add some chopped fresh herbs and a dash of cayenne pepper to the basic seared scallops recipe for a little more pizazz er, FPC?

I just joined Dogwood Farms CSA at Duke Farms in Hillsborough (http://dogwoodfarmsnj.com/csa-farm-shares/) and found out that one of the first things that will be available are radishes.  I've always wanted to love radishes served as an appetizer as the French do: red radishes pretty as a picture served with fresh butter and salt, preferably sitting at a little farmhouse porch in Provence...Reality  - taking a bite of radish and having your taste buds blasted by peppery-ness so pungent that that French daydream disappears in a flash. Too much FPC!
Lunch at work.
Pink Lady radishes have changed my tune.  I found them in the organic section at Wegman's.  This variety is not red, but a gorgeous fluorescent pink, and here's the best part:  mild enough to enjoy with butter and salt on brown bread, even in the middle of New Jersey!

I scarfed down three (small) open faced radish sandwiches, while I was making this great salad, which would be just right with grilled fish, chicken or steak, or on its own for lunch, with or without wedges of hard boiled egg or a can of tuna.  I think this recipe would be good with any variety of radish, but if you can find the  Pink Ladies, they're beautiful and delicious.

(You can find current and back issues of Bon Appetit,  Cook's Illustrated, Saveur, and more at our Library.)

White Bean and Radish Salad, adapted from Bon Appetit, May 2013

1 anchovy fillets, packed in oil, drained (or you can substitute a half (or whole) can of tuna if you are a sissy so wish)
1/3 cup extra virgin olive oil
1 Tablespoon drained capers
1/3 cup (packed) flat leaf parsley + 1/4 cup leaves left whole
3 Tablespoons white wine vinegar
Kosher salt
Freshly ground black pepper
1 15 oz. can or cannellini (white kidney) beans, rinsed and drained
1 bunch radishes, trimmed, cut into thin wedges
1 scallion, thinly sliced
1/3 cup oil-cured black olives, pitted and quartered

Put the fish, olive oil, capers and parsley in a blender and blend until coarsely pureed (or use an immersion blender or food processor).  Put the puree in a bowl, and mix in the vinegar, salt and pepper.  Add the beans, radishes, scallions and olives.  Mix well, taste and add more vinegar, salt and pepper if desired.  Cover and chill, garnish with the whole parsley leaves..  Tastes best after several hours marinating.

This is a basic white bean/vinaigrette recipe.  Feel free to substitute whatever looks good in the market - cherry tomatoes and feta? cucumber with mint and red onion?   Definitely high in flavor, fiber, taste and nutrition.  Take that, Murray's Cheese Shop!

Diane Whitman
Reference Librarian
Twitter: @whitlibrarian
Accidental FPC Hound